Taught by Tina May
I know this is a lesson you’re so excited about - taking the elements we’ve created with HTML and making them beautiful.
CSS is an entirely new language, and that means we’re going to learn to work with a new syntax and basically forget everything we learned in HTML. The way we write CSS code to tell the browser how to style our elements is totally different and we no longer have open and close tags with our angle brackets.
Luckily, the syntax for CSS is even more straightforward - we basically tell the browser which elements we want to style, and what styles to apply.
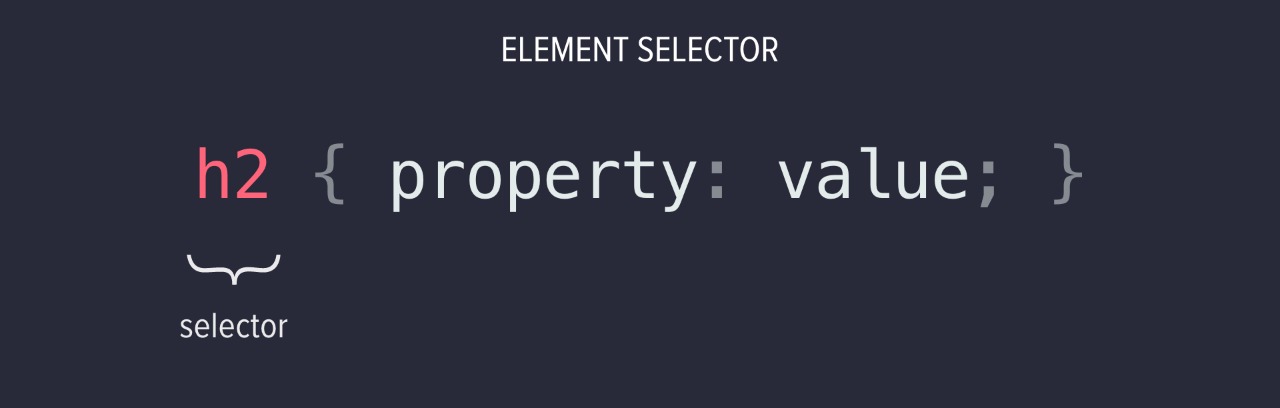
First, we have our selector and then wrapped in a set of curly brackets we have our property and value. We always use this exact format - curly brackets, a colon after the property, and a semi-colon after the value.
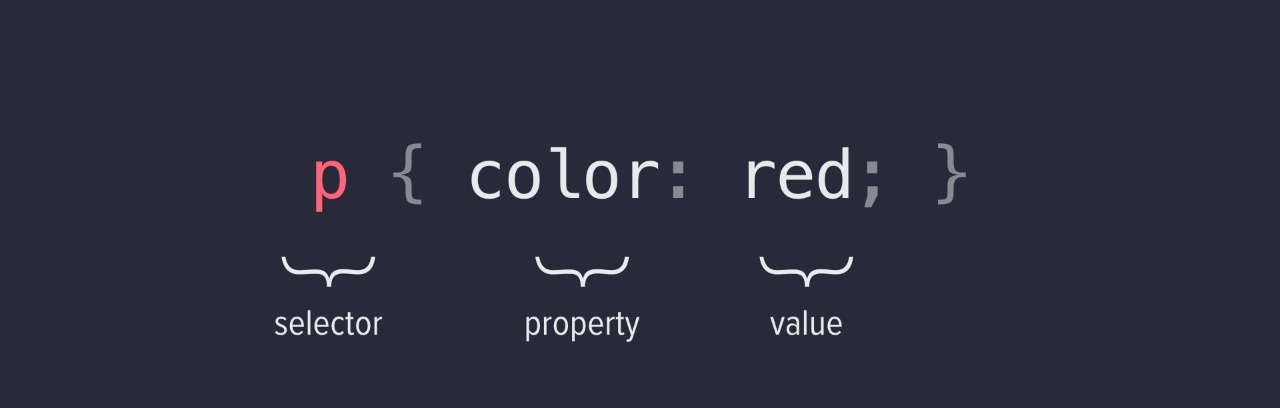
There are lots of different selectors in CSS, but the simplest one is the element selector which selects every single element of the same type. So if we want to select all of our h2 headings, then we use a h2 selector. If we want to select our paragraphs, we use the p selector. The same element name that’s inside our open and close tags in HTML is used as the element selector in CSS.
So if we wanted to set all of our paragraphs to be red, what we would do is to use the p selector to select all of the paragraphs, and then we set the color property to a value of red.
There are hundreds of different CSS properties out there, and we’re going to start by learning how to change the color, & background color.
We use the color property to change the color of the text and background-color to change the background color of the element.
h1 {
	color: red;
	background-color: black;
}
Little side note - did you see that there were two properties and values for one selector? This is because we can place as many properties inside the curly brackets as we want and only use one selector. This is great for larger projects where you might have half a dozen or more properties for one selector.
We can use 3 different types of color values:
1. We have color names that work on every browser which you can find here. These aren’t always the nicest colors, so I generally stick to using this for black and white, or when I’m just playing around with code.
h1 {
	background-color: ForestGreen;
}
2. Next we have Hexadecimal (HEX) codes. These are the standard in most design functions and by far the quickest to add. Remember that HEX codes always begin with the hash # symbol. You can look up for HEX color inspirations on sites like Flatuicolors or Coolors.
h2 {
	color: #228B22
}
3. Last up, we have RGB values. These are what we call the primary colors - Red, Green, and Blue. In CSS you can specify your colors based on these values. Each of the numbers has a range of 0 to 255. The higher the number, the stronger the color intensity.
If they are all 0 (0,0,0) you get black and if they are all 255 (255,255,255) you get white. These are beginners’ favorites because it’s easy to see how small changes to the numbers change the color. Increase the first number (the red part) and you get a warmer color. Increase the third number (the blue) you get a cooler color.
 h3 {
 	color: rgb(34, 139, 34)
 }
In CSS you can also add comments to make notes or organize different sections of your stylesheet. Everything that you put inside a comment syntax will have no effect on the layout of your webpage. Personally, I like to use this to save colors I really like and want to apply to the stylesheet, so let’s do that.
/*
	Cream - #f4f1de
	Navy - #3d405b
	Green - #81b59a
*/
By default, every element in HTML is treated as a rectangular box by the CSS as seen below.
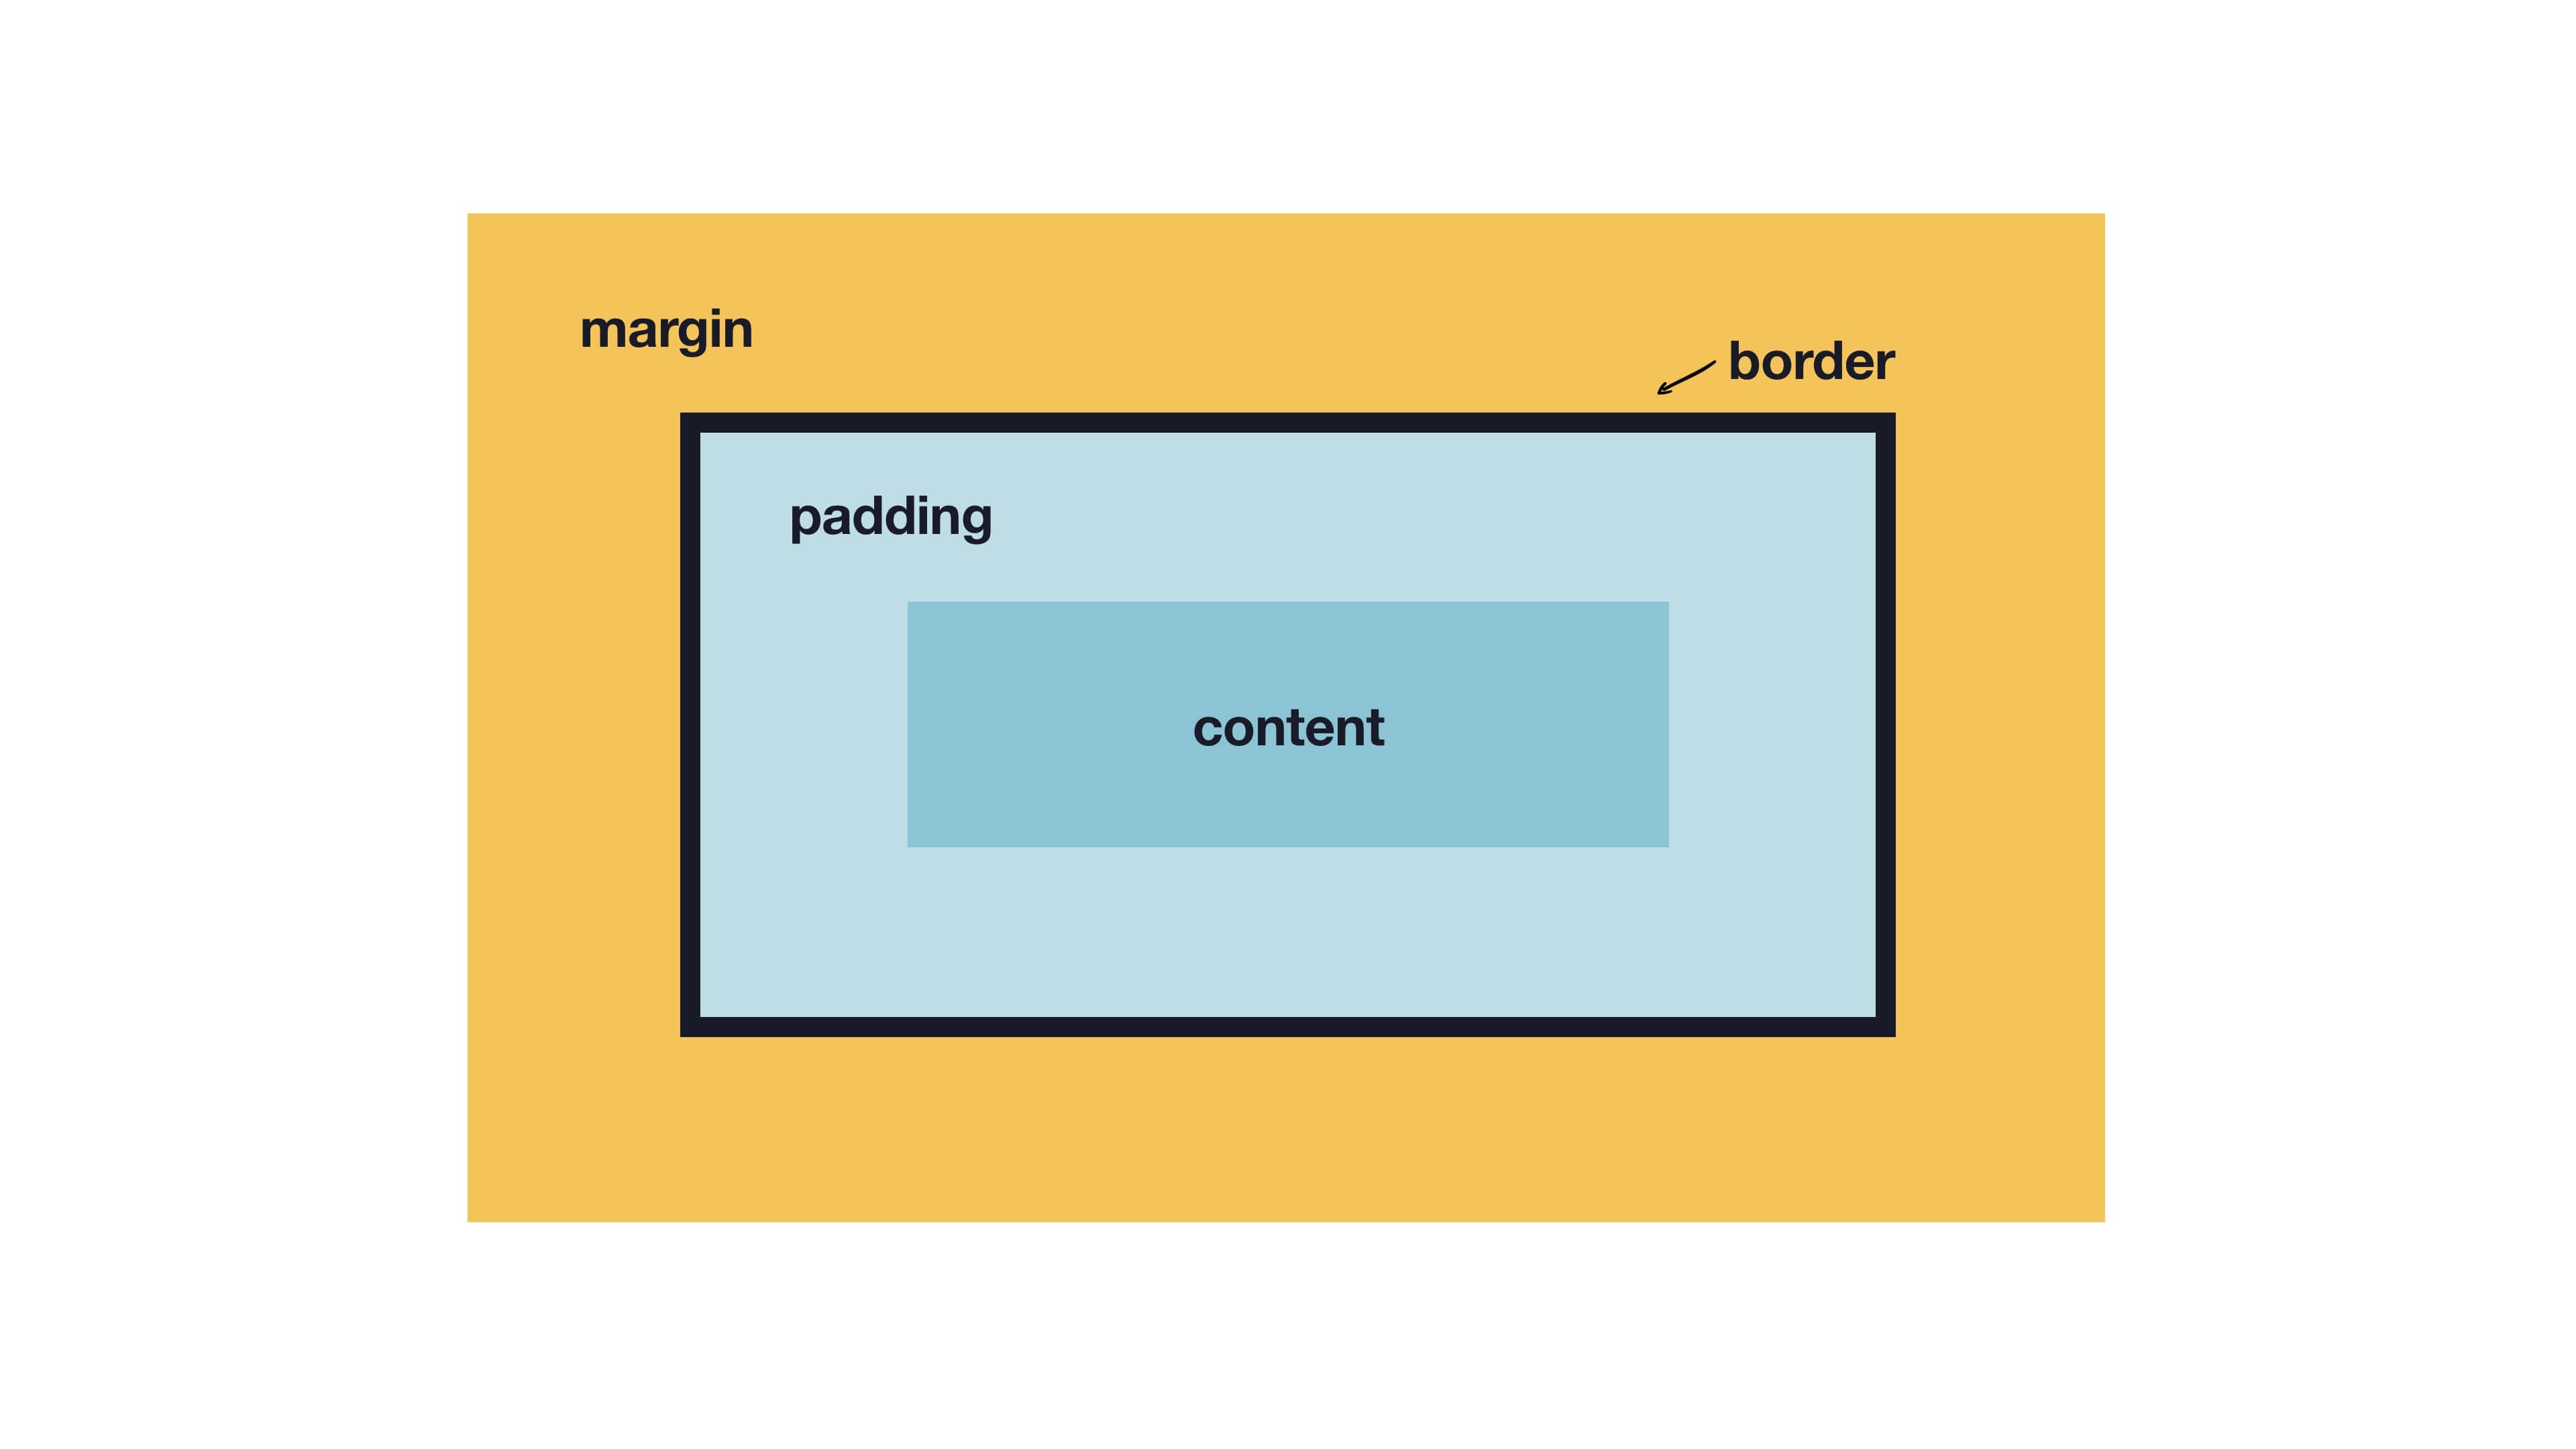
The CSS also gives us the control to customize the spacing of the box. There are 2 ways to do that:
The first is by applying padding inside the border of the element to create space within.
h1 {
	padding: 50px;
}
The second way is by applying margin outside the border of the element to create space around it.
h1 {
	margin: 50px;
}
If we apply these to an element that doesn’t have any background color or border, it’s impossible to see the difference between padding and margin, but it’s still worth keeping the concept in mind. Later if you do decide to add a background color, your negative space already kind of works for that.
To make it easier to digest, think of the padding as your body fat that protects everything within your body. While the margin is like your personal space between yourself and other humans that you feel comfortable within. In real-world applications, we often use a combination of both, for example:
h1 {
	background-color: #81b29a;
	color: #f4f1de;
	padding: 50px;
	margin: 50px;
}
Quick tip, if you are trying to style the background of the page itself you can use the <body> element.
body {
	background-color: yellow;
	padding: 5%;
}
Want to copy our color codes?
See you tomorrow for another new lesson & activity!